Everything you Need to Know about Exposure in Photography
Blogs
Exposure is one of the most vital aspects of photography. With poor exposure, your image might be totally washed out, or it might be too dark to really see any contrast.
From understanding the theory behind it to the practical skills required to control it, we’ll guide you through everything you need to know about exposure in photography. Regardless of whether you’re a beginner getting to grips with your first camera, or an experienced photographer aiming to refresh your knowledge, this comprehensive guide will empower you with the tools and knowledge you need to take your photography to the next level.
After all, it’s not only about capturing a moment but capturing it beautifully and meaningfully. This, in essence, is the philosophy that leads to truly powerful images.
What is Exposure in Photography?
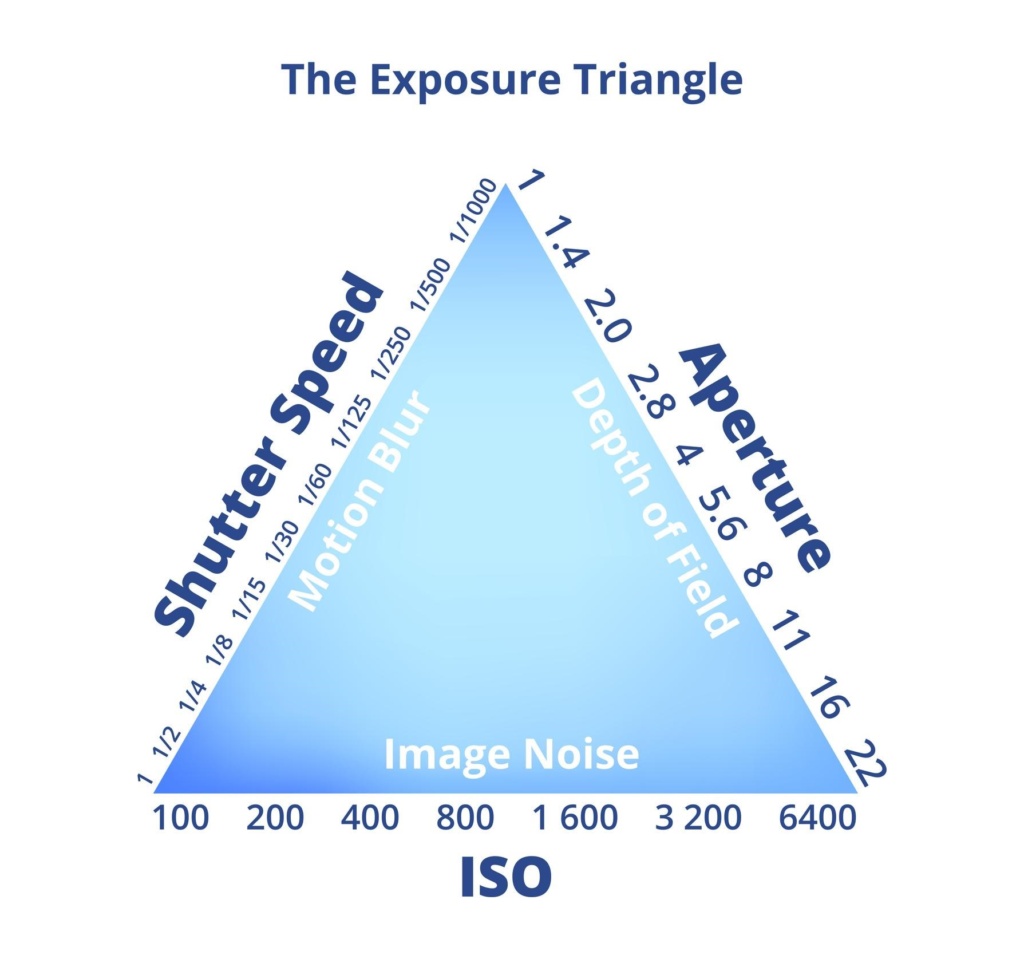
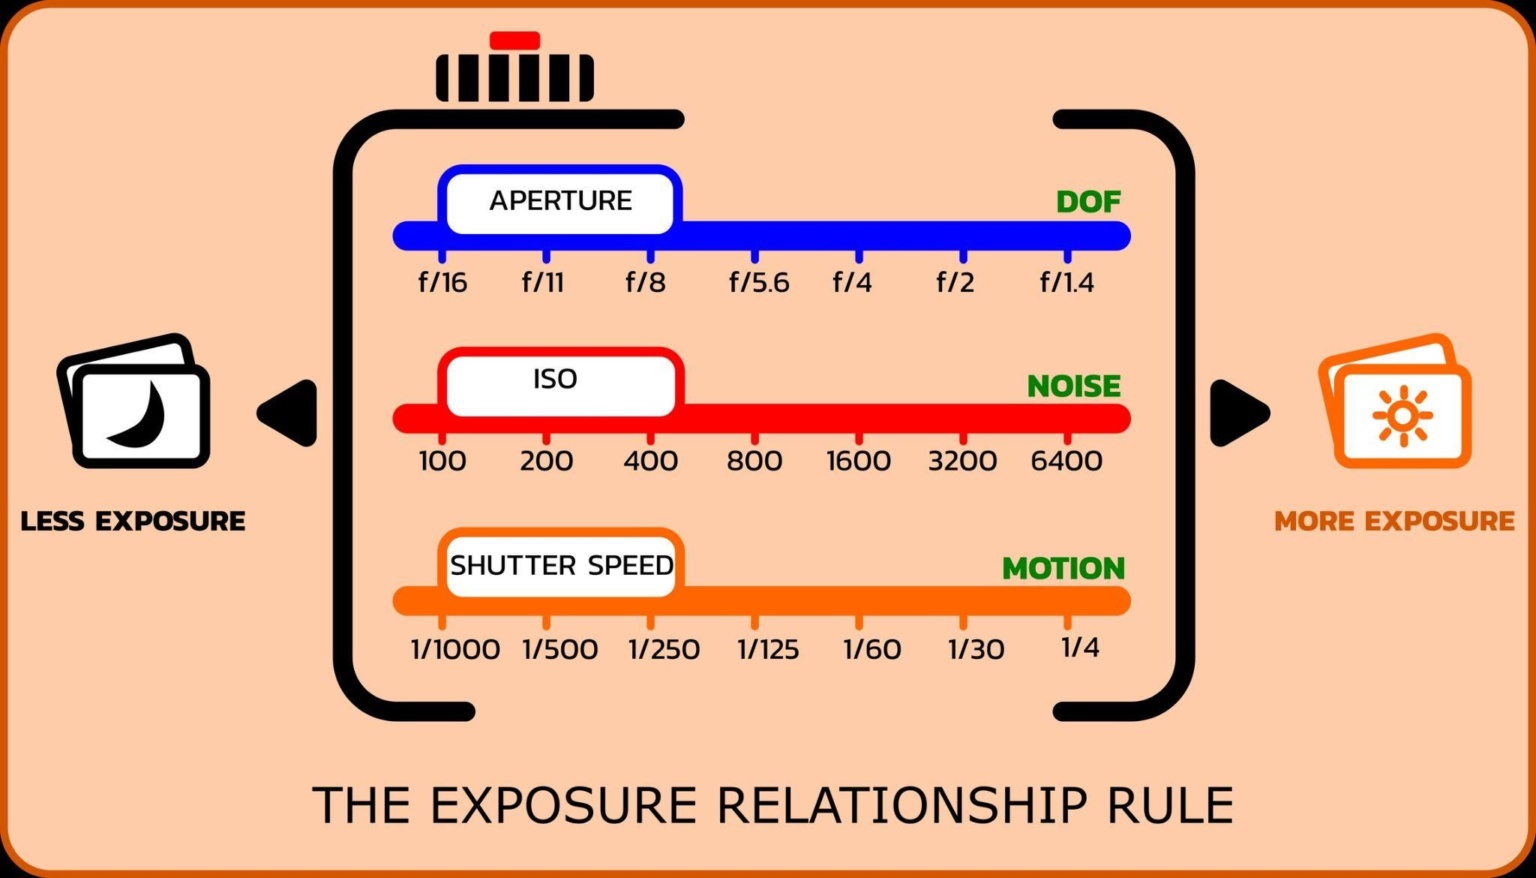
Exposure in photography refers to the amount of light that reaches your camera’s sensor or film, thus determining the brightness or darkness of your captured image. It is influenced primarily by two camera settings: shutter speed and aperture, which collectively dictate the “luminous exposure” of a photograph. Then there is ISO, which refers to the sensitivity of the camera’s light sensor. These three factors together are known as the Exposure Triangle. Let’s look at this a little more closely!
The Exposure Triangle
The Exposure Triangle is a fundamental concept in photography that encapsulates the relationship between three crucial settings: shutter speed, aperture, and ISO. It acts as a balancing act, where an adjustment to one element necessitates a corresponding change to at least one of the others to maintain a consistent exposure. Let’s look at each factor more closely, starting with shutter speed.
Shutter Speed
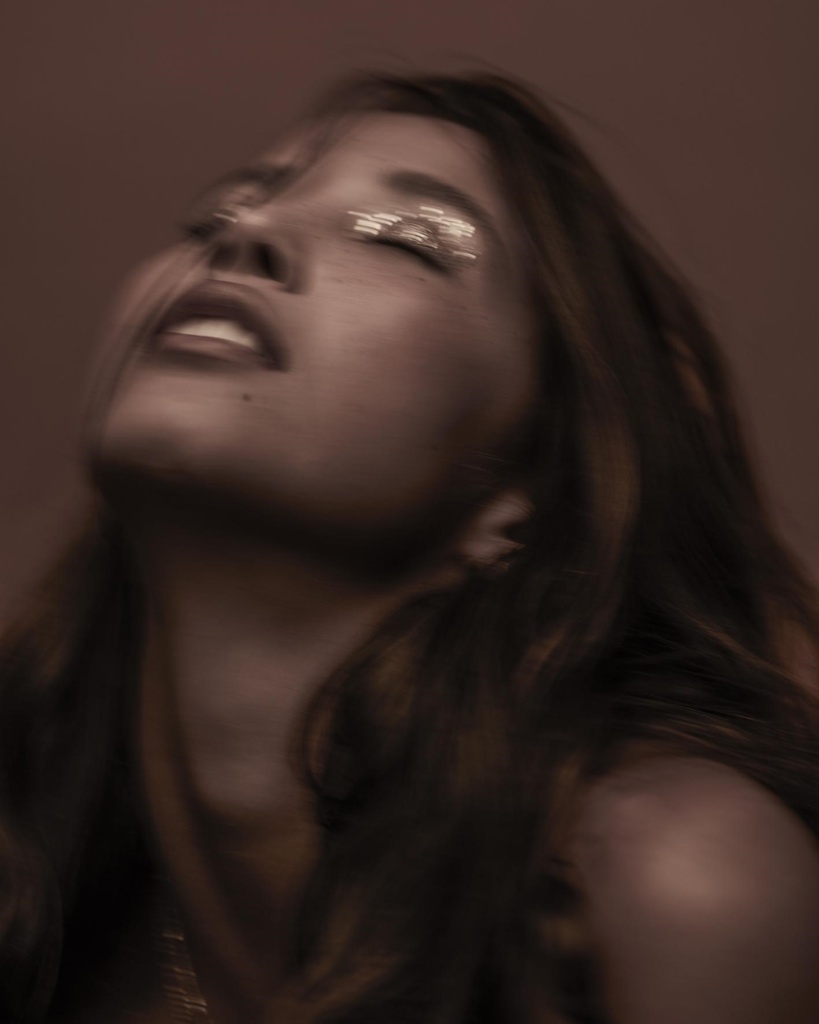
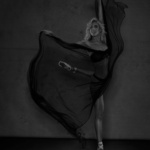
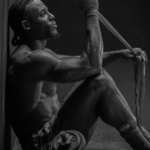
This image was taken at a shutter speed of 1/30. You can see the motion blur created due to the slow shutter speed.
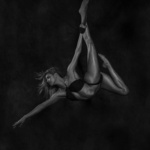
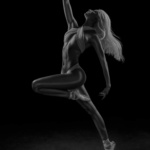
This image was taken at a shutter speed of 1/200. Notice the crisp contour and details in the subject due to the fast shutter speed.
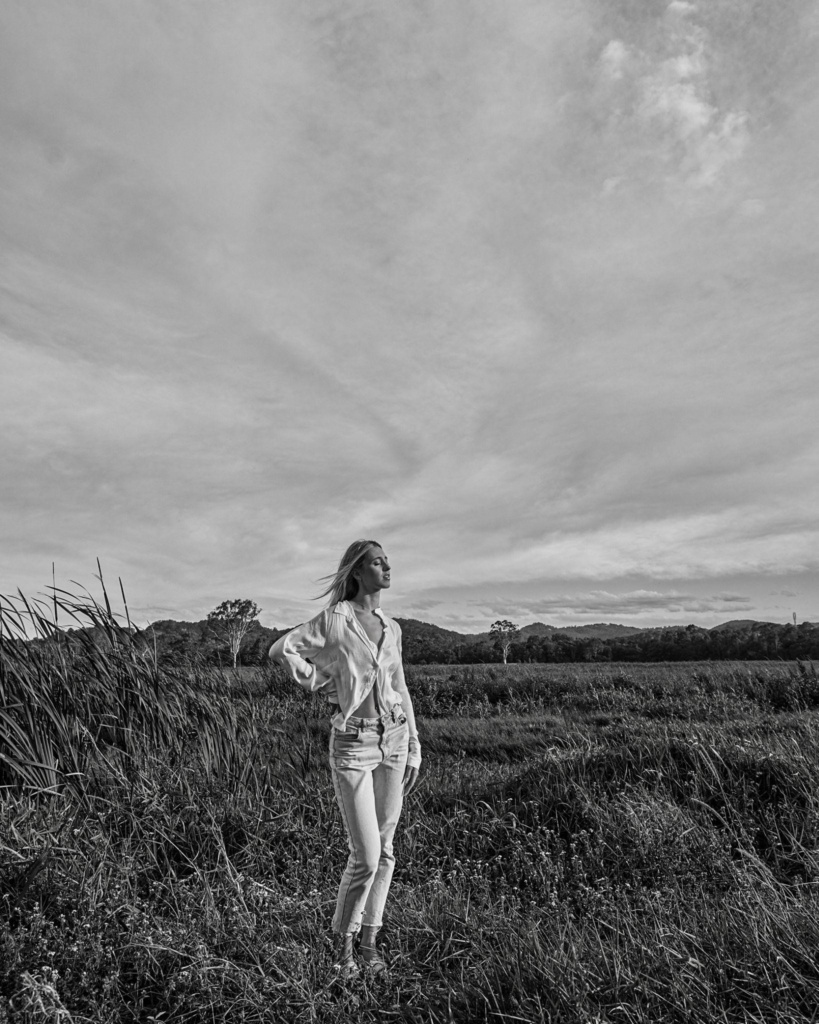
Shutter speed is a key component of the Exposure Triangle and plays a pivotal role in determining the exposure of a photograph. It refers to the length of time the camera’s shutter is open, allowing light to reach the sensor or film. Shutter speed is usually measured in fractions of a second when it is under a second, for example, 1/200 means the shutter is open for one two-hundredth of a second.
A faster shutter speed (e.g., 1/2000 sec) will allow less light to hit the sensor since the shutter is open for a very brief time. This results in a darker image and is useful for freezing fast-moving subjects, reducing the chance of motion blur. Conversely, a slower shutter speed (e.g., 1/30 sec) leaves the shutter open longer, allowing more light to reach the sensor and resulting in a brighter image. This can introduce motion blur to your photos, which can be used creatively to convey a sense of movement.
Therefore, understanding and adjusting shutter speed allows photographers not only to control the exposure of their images but also to manage motion effects, providing a powerful tool for creative expression in their photography.
Aperture
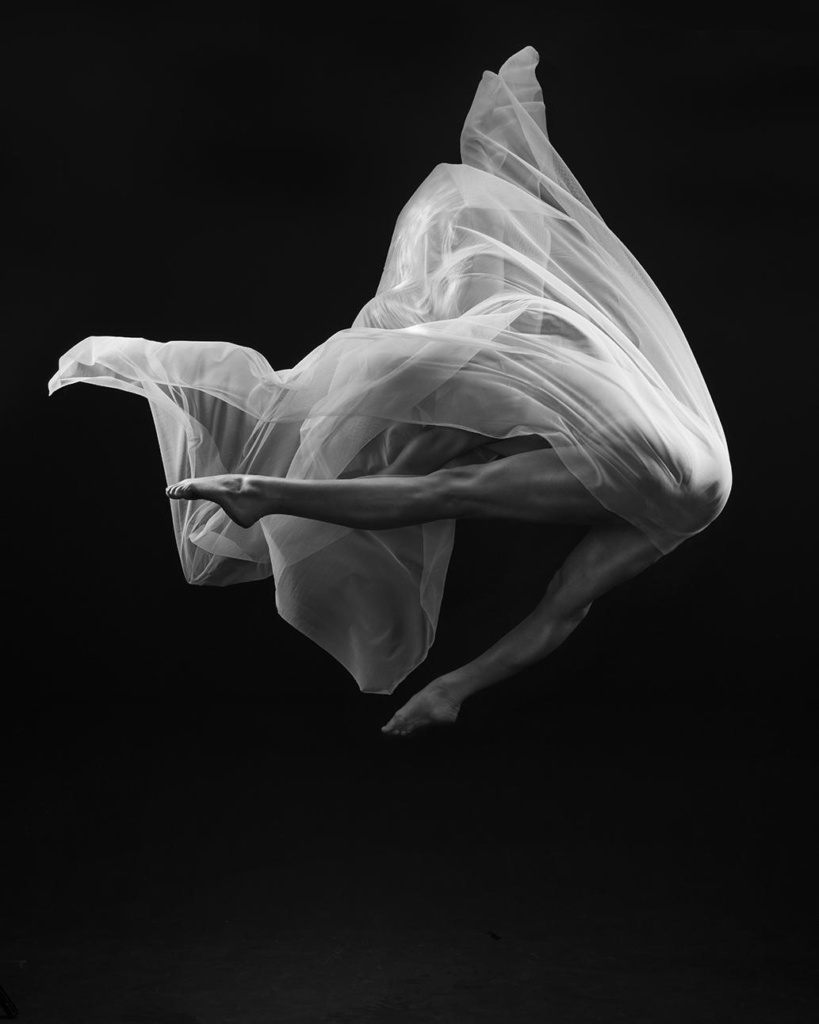
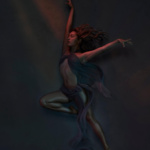
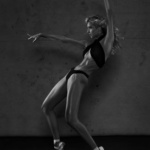
This image was capture with an aperture of F/2.8. Notice the shallow depth of field due to the large aperture.
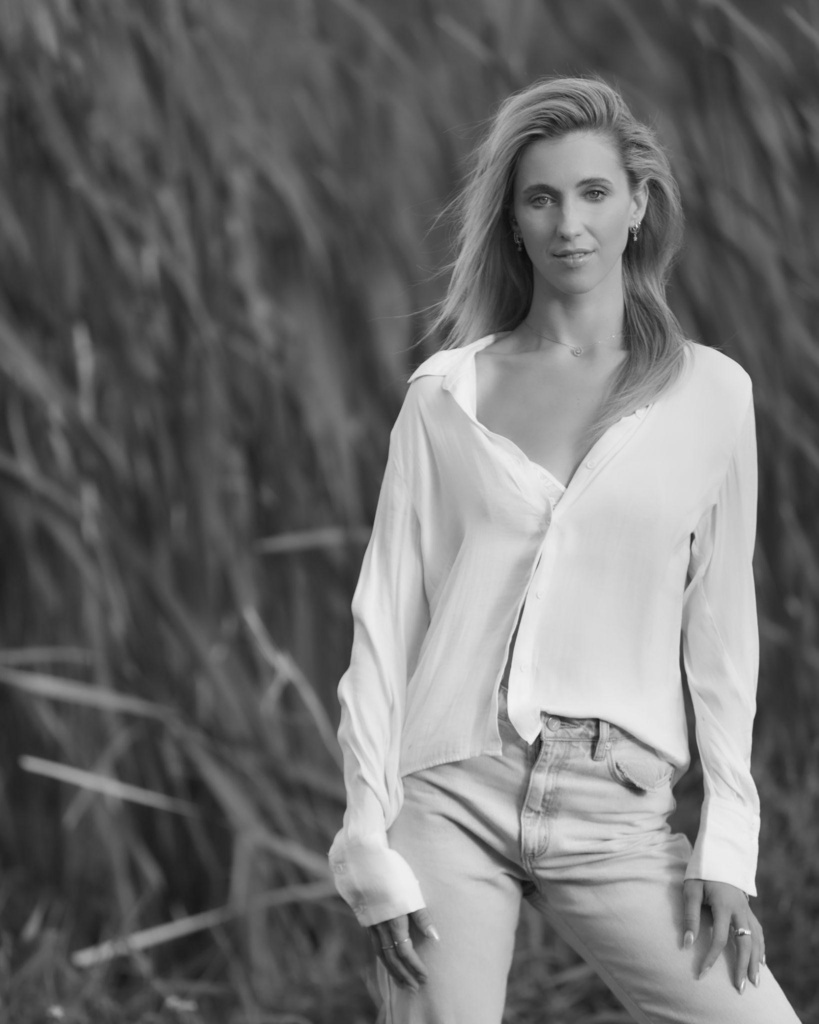
This image used an aperture of F/16. Notice the crisp and detailed background due to the small aperture.
Aperture is another key component of the Exposure Triangle, working in tandem with shutter speed to determine the overall exposure of a photograph. Aperture refers to the size of the opening in the lens through which light passes into the camera and reaches the sensor. It’s measured in f-stops (such as f/2.8, f/5.6, f/16), and contrary to what might seem intuitive, a lower f-stop denotes a larger aperture and vice versa.
A larger aperture (e.g., f/2.8) means more light enters the camera due to the wider opening, leading to a brighter image, making a large aperture useful in low light situations. This setting also results in a shallower depth of field, making the subject sharp against a blurred background, ideal for portraits and close-ups. On the other hand, a smaller aperture (e.g., f/16) allows less light to enter the camera, resulting in a darker but sharper image across a wider range, perfect for landscape photography where more detail is desired.
Just like shutter speed, the aperture isn’t only about controlling light and exposure; it’s also about achieving creative effects. By skilfully balancing shutter speed and aperture, photographers can obtain the right exposure for their images while also manipulating motion effects and depth of field to best serve their artistic vision. Learn more about aperture here.
ISO
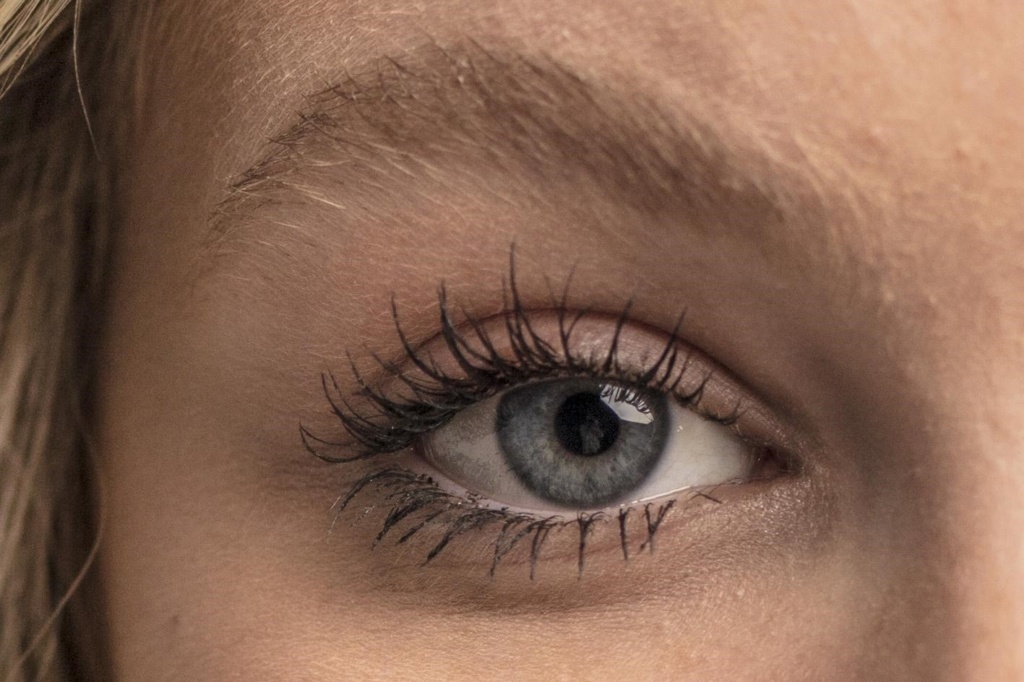
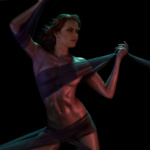
This image was taken with an ISO of 100. Notice that there is little grain/noise in the image.
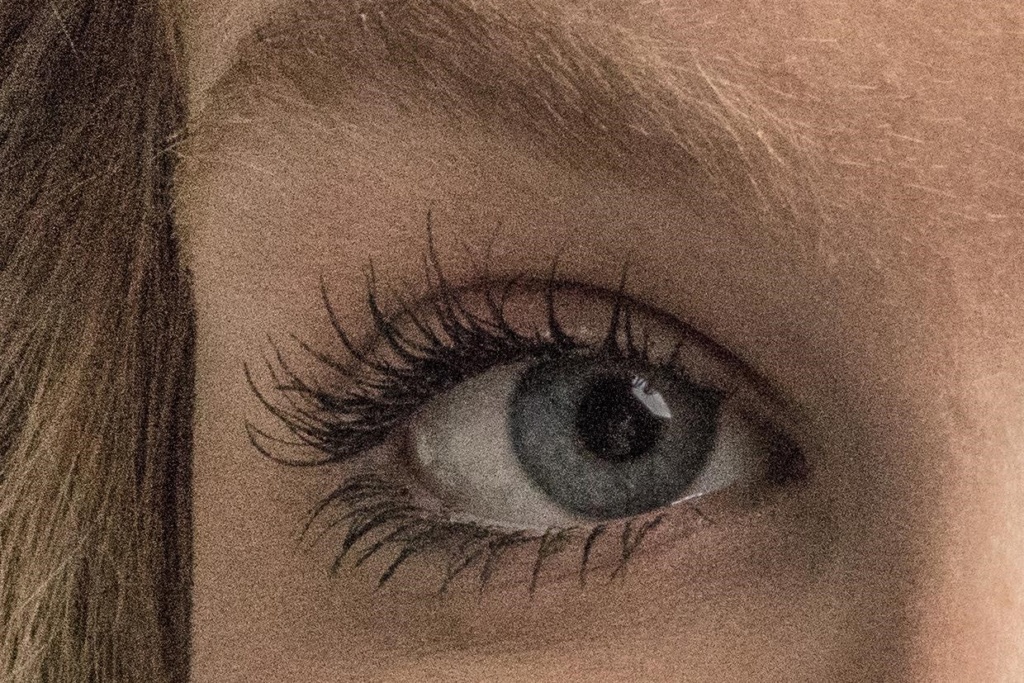
This image was taken with an ISO of 3200. There is a grainy effect, known as 'noise'. This can be a stylistic choice for some.
ISO, the final factor of the Exposure Triangle, is distinct from shutter speed and aperture in that it doesn’t affect the amount of light entering the camera but instead regulates how the camera sensor responds to this light.
ISO is a measure of the camera sensor’s sensitivity to light. A lower ISO value (e.g., 100 or 200) means the sensor has less sensitivity to light, producing a darker image. This setting is suitable for bright conditions, like a sunny day, where there is ample light. Lower ISOs typically result in cleaner, sharper images with minimal digital noise or ‘grain’.
On the contrary, a higher ISO value (e.g., 800, 1600, or higher) increases the sensor’s sensitivity to light, brightening the image. This can be particularly useful in low light conditions where you may not wish to or be able to adjust shutter speed or aperture to allow more light in, such as in event or indoor photography. However, higher ISO values can introduce more digital noise or ‘grain’ into your images, which can degrade the overall image quality if not managed properly.
Understanding and adjusting ISO along with shutter speed and aperture gives photographers full control over their camera’s exposure settings. This triad allows for both technical precision and creative flexibility, providing a comprehensive toolkit for producing stunning and captivating photographs under any lighting condition.
Learn More about Exposure with John Barrett's Online Photography Courses
Understanding and mastering the intricate dance of exposure is fundamental to unleashing your full potential as a photographer. By gaining command over these crucial elements, you control not just the exposure but also the depth of field, motion effects, and even the artistic mood of your images, transforming your unique visions into visually striking photographs.
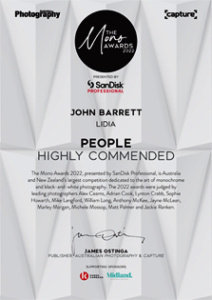
To delve deeper into the nuances of exposure control, and expand your skills in other vital areas of photography, consider participating in one of John Barrett’s online photography courses or the CI2CI video series. With over 40 years of experience capturing award-winning images, John offers invaluable insights into the art of photography, imparting the knowledge required to convert your creative ideas into compelling images you can take pride in.
For a more personalised learning experience, you can also explore the opportunity of becoming a protégé under John’s guidance with his 1-on-1 photography mentoring.
Take the leap towards mastering exposure and enhancing your overall photographic skills, and watch your images transform as you capture the world around you through a more sophisticated and skilled lens.
John Barrett
John Barrett has been an award-winning professional photographer for decades, having gone from high school straight into one of the best fashion photography studios in Australia. Now based on the Gold Coast in Australia, JB creates stunning images from a state-of-the-art photographic studio only ten minutes from Gold Coast Airport with the beautiful locations of South East Queensland and Northern New South Wales on the doorstep. He also offers online photography courses for photographers of all levels. Sign up today!